Web Service can be added in a Web project or in Ejb project. Netbeans IDE helps the developers to easily develop and test the webservices. It’s easy to make the Web Service program in Netbeans, which has Glassfish server by default.
Web Service program in Web Project
--> In Netbeans take new web project in figure 1
--> In Netbeans take new web project in figure 1
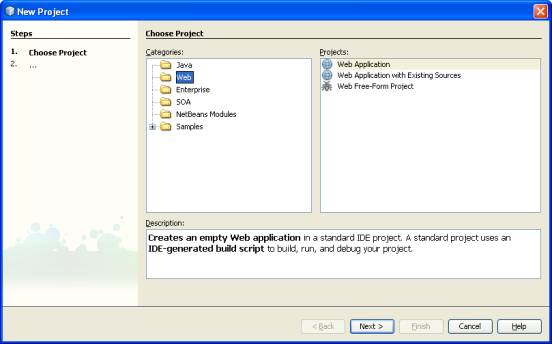
Figure 1
--> Give project name webservice1 as shown in figure 2
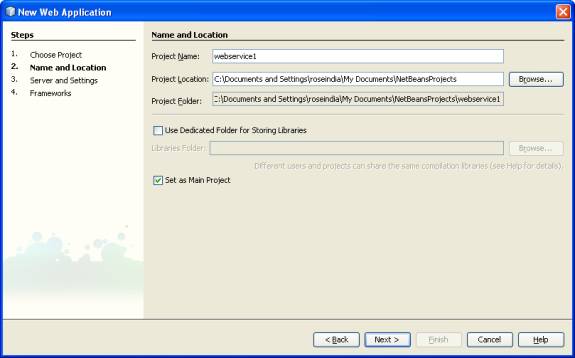
Figure 2
--> Select the server name in figure 3
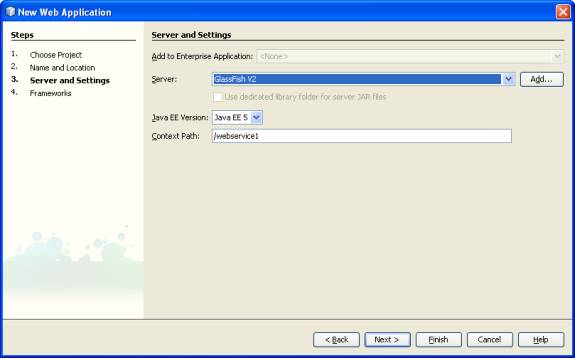
Figure 3
--> Now Rt Click on the Web Service project as in figure 4
--> Select New ->WebService
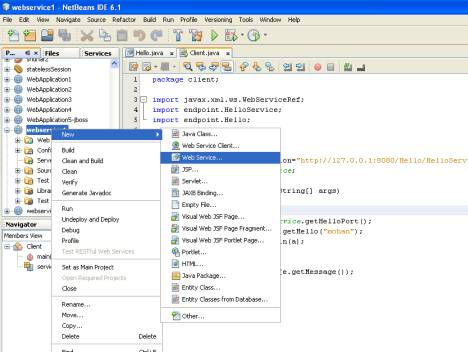
Figure 4
--> Now give the name of the Web Service and package name figure 5
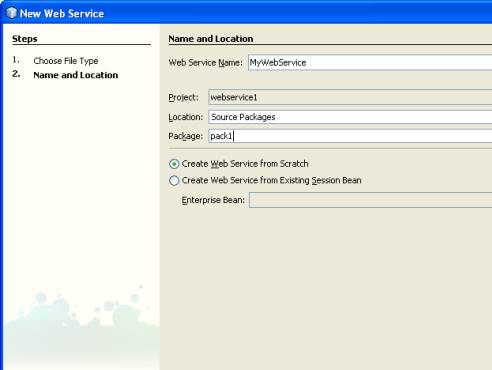
Figure 5
-->Now In design view of Web Service click on Add Operation in figure 6

Figure 6
--> Here give the operation name and parameter name and type as shown in figure 7
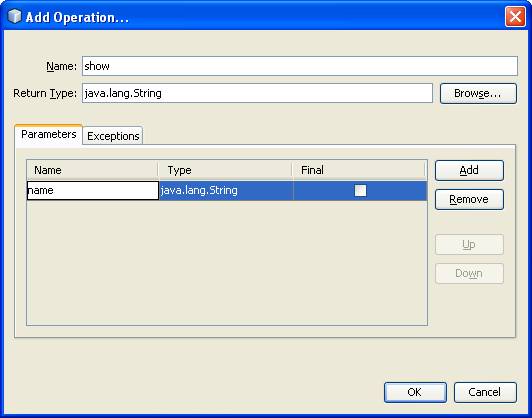
Figure 7
--> Now in source view change the return null to return “hello ”+name as in figure 8
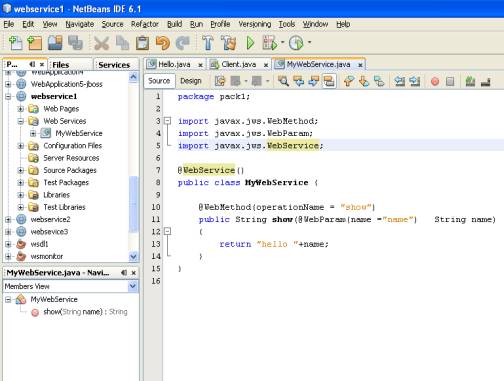
Figure 8
--> Now Rt Click on the project and deploy it on the server as in figure 9
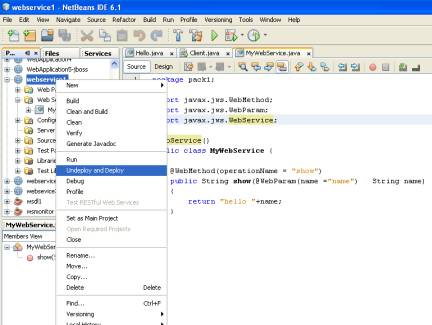
Figure 9
It will deploy the war file on to the server
--> Now test the web service program
--> Rt click on the MyWebService in web services folder and select Test Web Operation as in figure 10
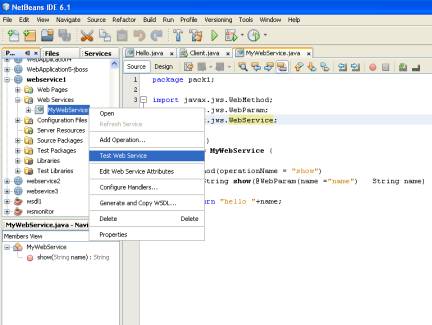
Figure 10
--> It will open the Web Service program in browser as in figure 11
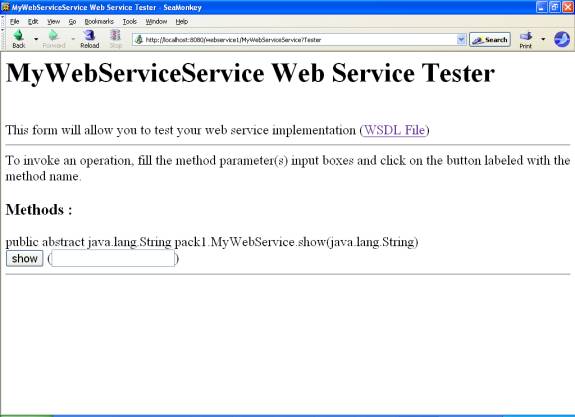
Figure 11
--> Click on WSDL File in blue color .It will open the WSDL file in the browser as in figure 12
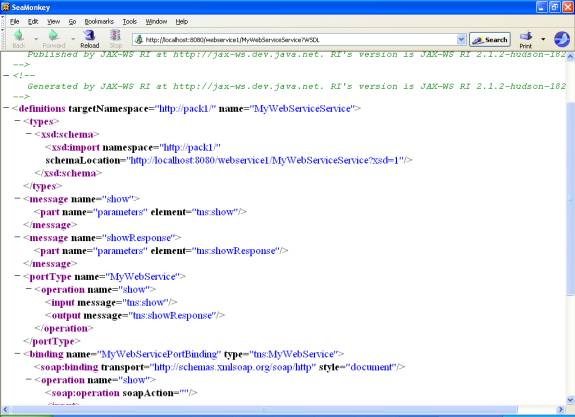
Figure 12
--> Now as in fig type the roseindia in the text field and click on show button as in figure 13
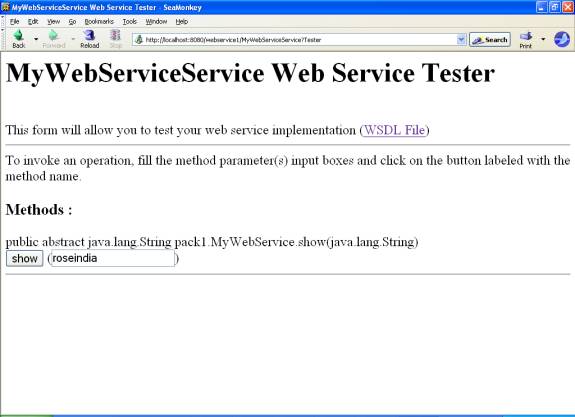
Figure 13
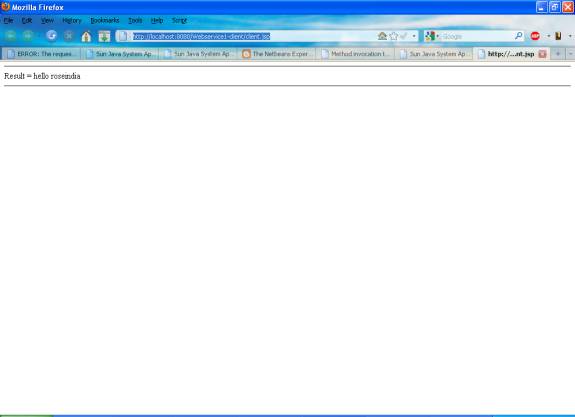
It will return hello roseindia
It also give the SOAP request and SOAP response pf the Web Service as in figure 14
It also give the SOAP request and SOAP response pf the Web Service as in figure 14
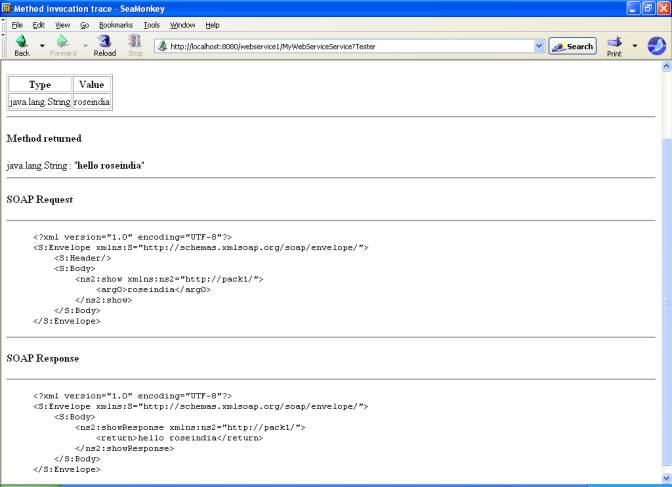
Figure 14
--> Now make the client file.Client file can be java servlet , jsp and standalone java file
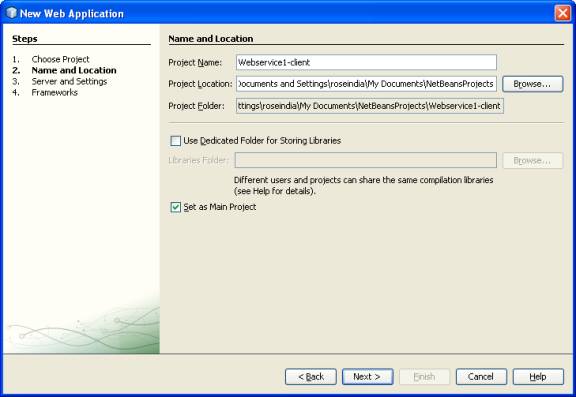
--> Start a new web project as in figure 15.
--> Give project name as Webservice1-client
--> Start a new web project as in figure 15.
--> Give project name as Webservice1-client
--> Now Rt. Click on the project select NewàWeb Service client
--> Here now select the WSDL file of the Web Service as in figure 15
--> Click on the Browse.
--> Click on the Browse.
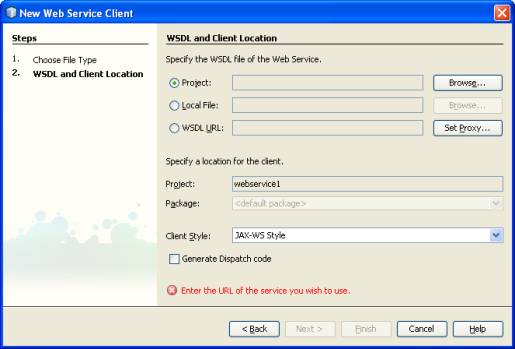
--> Now select the webservice1 -> MyWebService
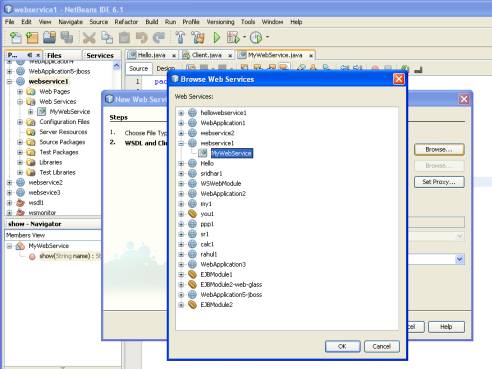
Figure 15
Figure 15
It creates the Client environments for the Web Service in the given project
--> Now make a Client file by just taking a new Jsp file as in figure 16
--> Now make a Client file by just taking a new Jsp file as in figure 16
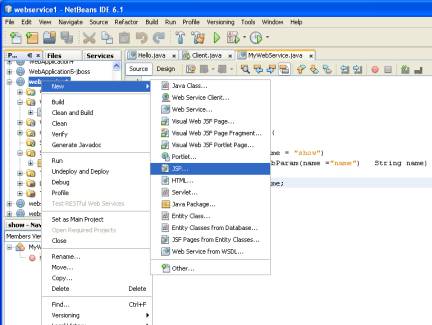
Figure 16
--> Give the file name as client.jsp
--> Rt click in client.jsp file code and select Web Service Client resources -->Call Web Service Operation in figure 17
--> Rt click in client.jsp file code and select Web Service Client resources -->Call Web Service Operation in figure 17
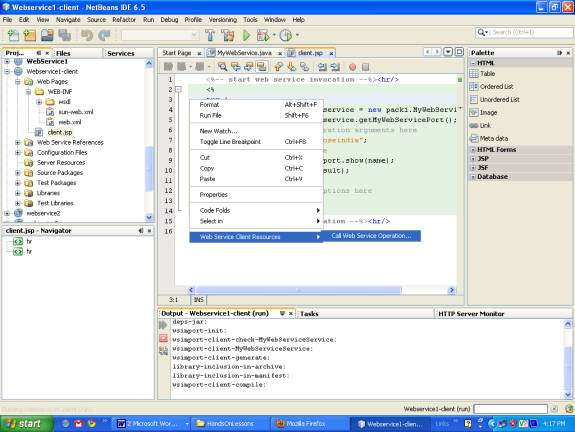
Figure 17
--> Select the web service project ->web service file->web service port->operation name as in figure 18
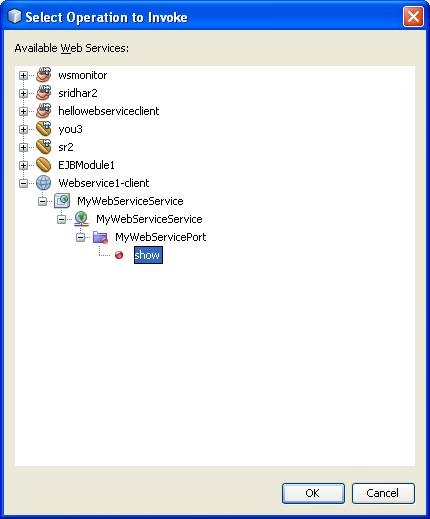
Figure 18
--> Change the name =”null” to name=”roseindia” as in figure 19
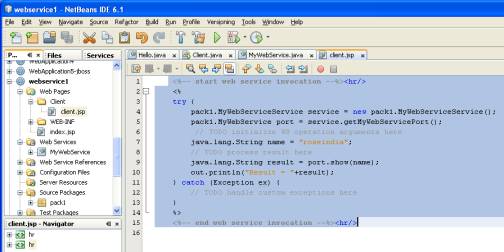
Figure 19
--> Rt click in client.jsp and select run client.jsp
No comments:
Post a Comment